

Whether an upgrade or a new installation, dispensers consider an in-office finishing lab for three reasons — to improve their bottom line, to improve the speed of delivering eyewear to their patients, and to maintain a consistent level of quality on that eyewear. The success of achieving those goals is dependent on the edger, which is the nucleus of the lab and by far its most expensive piece of equipment. Lens spoilage can be expensive and understanding the complexities of edger technology is critical to avoiding edging errors.
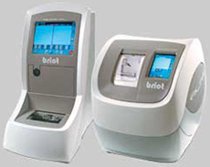 |
| A typical edging system - edger and optical blocker. |
An edger cuts a lens into the shape of the frame. Ancillary equipment, such as hand-stone and buffer as well as lens mounting apparatus, which includes pliers and hot air frame heater, complete the finishing process.
Premium lens products, especially A-R coatings, high-index and polycarbonate, are all handled easily with the sophistication of today's edging systems. The latest frame styles also affect finishing lab performance and requirements. Smaller eye-sizes, the handling of different lens materials through the variety of lens edges (bevel, rimless, grooved, polished, etc.) are all built into a modern edger's capabilities. So, what are the basics of an edging system and "system" is the way that it should be thought of. No longer does an office buy only an edger.
Patternless edgers are the norm, a technology introduced in the late 80s, are the edger of choice for today's in-office finishing lab. Compared to the older, pattern-driven technology, patternless edgers are automated and faster, and also more expensive, with systems ranging between $25,000 to $65,000. In addition to cutting the lens and beveling its edge, systems include polishing and safety beveling, automatic grooving and drilling for rimless styles.
 |
| Surf the screen for the bevel needed. |
In addition, lens size and shape can be customized on special layout screens, while drilling hole size and position can be added into an edger's memory. Bevels can be tilted, moved front to back or specialized for some wrap frame requirements. These features, can increase the cost of an edger depending on manufacturer, but optimize the efficiency of the operator and create new frame style opportunities for any office.
The blocker and tracer are the two edging components critical to the edging process. Most new edgers systems feature the two devices together, although they don't have to be. Existing blockers and tracers may be used, which can lower the price of the new edger, but check with the manufacture to make sure the components will interface. Buy the most sophisticated edger that you can afford - you'll grow into its capabilities.
TRACING
While the edger prepares the lens to fit the frame, the blocker ensures that the lens is edged with the proper optical center and multifocal height positions. The tracer transmits the shape of the frame in digitized form. Many tracers can now also send tracing data via modem to the surfacing laboratory, where the lab receives lens size and shape data so that lens thinnesses are better calculated. Otherwise, most labs wait for a frame to arrive to best calculate lens thinness or use the A, B, ED and DBL dimensions to approximate final lens size when producing uncuts for an in-office finishing system. This can save time and exceed a patient's expectations of when they were told they would receive their eyewear.
Most tracers use a stylus that goes along the frame's eye wire, producing the digital radii measurements of size and shape of the frame. Dust, particles and other lens debris can disrupt the exactness of the measurement, although the unit can be cleared with a blast of "canned air," which is also handy for computer keyboards and edger instrument panels.
BLOCKER
The blocking stage starts with lens layout, which positions the lens for decentration, using PD, optical center and segment height measurements. Layout systems now use camera and video functions for exact positioning. The best blockers are also lensmeters i.e., they are able to analyze lens power and optical center location, adjust the position of the lens block before attaching it it the lens. The next step affixes a block to the lens, so it can be held by the edger lens chuck (a clamping device that holds the lens), in the edger.
Older edgers use hand tightened chucks, and over tightening can damage the lens. Modern edgers use pressurized heads, that are tuned to lens material for the correct amount of pressure (set by the edger manufacturer). In the past, when pressure was not adjusted to the proper level,lens damage occurred. Stiff blocks used correspond to the base-curve of the lens, and are affixed to the lens by "double sided finishing tape" or "pads." Modern systems use flexible blocks that assume the base curve shape of the lens. In addition, the double sided sticky pad has also been improved to account for the improvements to AR lenses i.e., easy cleaning hydro and oleophobic coatings. This helps protect the lens surface and minimize slippage of the blocked lens in the chuck.
Images, courtesy Briot USA