
By Mathew Guy Musladin, B.S., ABOM
Visualizing: The Webster's New World College Dictionary, Fifth Edition, defines it as "to form a mental image of; imagine, envision, etc." By the same reference, the word, imagine, means "to make a mental image of"… This means that visualizing and imagining are synonyms and are interchangeable. It also should lend credibility to the fact that we really see with our brains!
The root word of imagine is image. As opticians, we facilitate the means for people to see images more clearly with the aid of ophthalmic lenses. Visualizing how a wavefront interacts with the lens helps us easily understand the impact of lens tilts to induce oblique astigmatism. As we hone our optical skills, the greater the depth of our imagination, the broader the spectrum of solutions we can create. This creativity will serve to better fulfill the needs of our clientele.
Clients appreciate skilled people. They will tell others about positive experiences and recommend those same people to professionals they know. Therefore, positive impressions can really enhance your reputation. This word-of-mouth promotion can be very profitable; imagine that! To that end, the following is just one application of using your imagination. It will increase your skill set. I also hope it will lead you to consciously use visualization in other areas of your profession as well as your life.
Use the following basic visuals to imagine how a wavefront reacts to differently mounted lens angles:
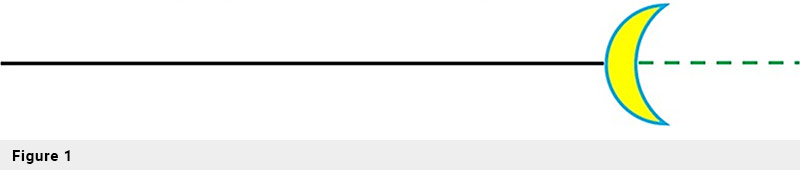
First, imagine a thread along the optical axis of a plus lens with a steep base curve. (Fig. 1)
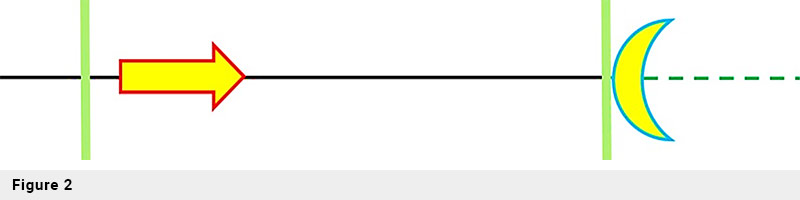
Now imagine the wavefront as a sheet of paper that is perpendicular to that thread, with the thread right in the middle. The sheet of paper starts 20 feet from the lens but moves toward the lens along the thread. As it gets closer and closer, it finally contacts the lens, but only at one point, the optical center, which is the center of curvature of the lens. (Fig. 2)
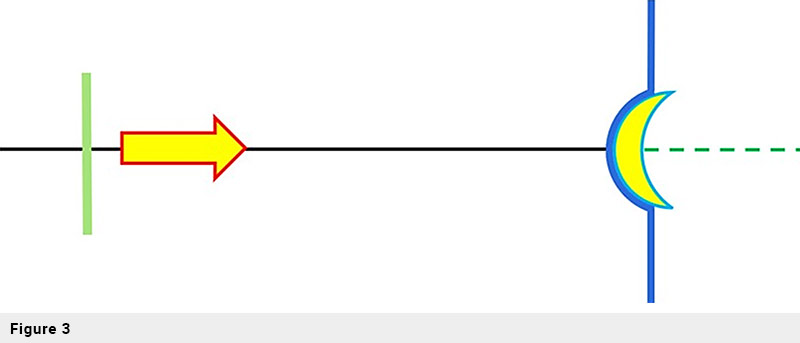
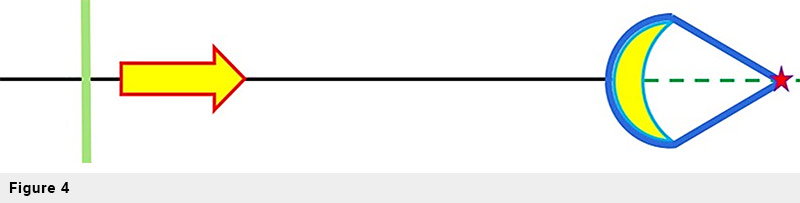
Now imagine that sheet of paper transforming into a sheet of saran wrap. As it continues along the "thread" of the optical axis, it engulfs itself around the rest of the base curve. (Fig. 3) It will eventually come to a cone-like point along the optical axis as it continues. (Fig. 4) That is the focal point.
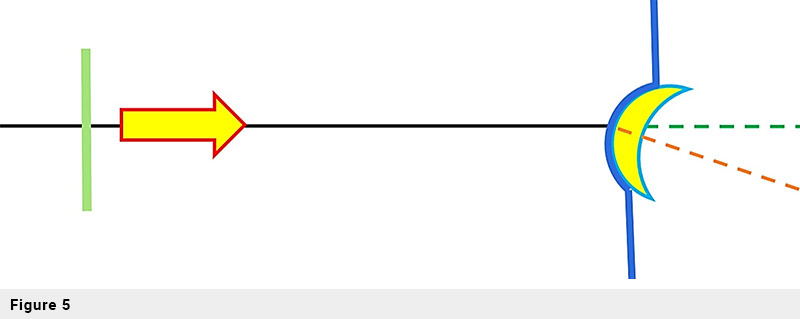
Now, imagine the same scenario but with the lens tilted in front of the visual axis. (Fig. 5) The optical axis of the lens is not in line with the visual axis. The sheet of paper does not contact the center of curvature of the lens first! When it turns into saran wrap, it no longer evenly forms a cone on the optical center but tilts out of line from the visual axis. This is an aberration:
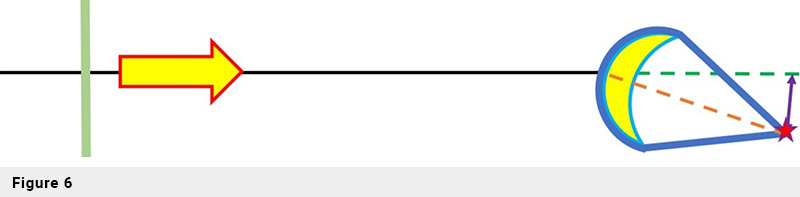
The aberration is known as either radial, marginal, or oblique astigmatism. It is represented by the purple line below. (Fig. 6)
This becomes a practical problem for opticians as the Rx power, faceform, and/or pantoscopic lens tilt increase. With the proliferation of high-wrap/high-pantoscopic tilt frame choices, this necessitates understanding the need to compensate for power and any axis in the prescription, as that type of frame selection will definitely "tilt" a lens from the perpendicular refracted position of the phoropter to an oblique angle decided by the frame selection.
What to conclude, then? Take accurate measurements for PD and OC height and wrap and pantoscopic tilt angle as the frame is worn! Again, the greater the refractive power of the correction, the greater the need for compensation. Develop a good rapport with the optical labs you work with and ask the lab to compensate for high wrap prescriptions. Or, use a freeform design that will automatically calculate the optimal optical surface to compensate for 'As Worn' aka position of wear. Although these graphics are simplistic, they do present the basic ideas. Close your eyes and visualize! Your intuition will grow deeper, as will your service to your clientele.